

Common Mistakes to Avoid When Hanging Artwork
Hanging artwork sounds simple. You hammer in a nail, loop the wire over it, and step back to admire the result. Except the picture is crooked. Or the nail pulls out of the plaster two weeks later and the frame hits the floor at 2am. Or you step back and realise the whole arrangement is six inches too high and the room looks wrong in a way you cannot quite explain.
These are not unusual outcomes. Hanging artwork incorrectly is one of the most common handyman call-outs in Cape Town, and the mistakes are almost always the same. Wrong fixings for the wall type, incorrect hanging height, no level, no planning before the first hole goes in. The good news is that every one of these mistakes is avoidable – and this guide covers all of them.
Whether you are putting up a single statement piece in a Camps Bay apartment, building a gallery wall in a Rondebosch family home, or rehinging artwork after a renovation in De Waterkant, the principles here apply. Get them right and the result looks effortless. Get them wrong and you are left with a wall full of holes.
Key Takeaways
- Always identify your wall type before choosing fixings – plaster over brick, drywall, and concrete all need different anchors.
- The centre of artwork should sit at roughly 145-150cm from the floor – not the top of the frame.
- Use a spirit level every time, without exception – the eye alone cannot reliably detect a one-degree tilt.
- Plan a gallery wall on the floor before putting a single hole in the wall.
- For heavy or valuable pieces, a professional picture hanging service is the safest and most precise option.
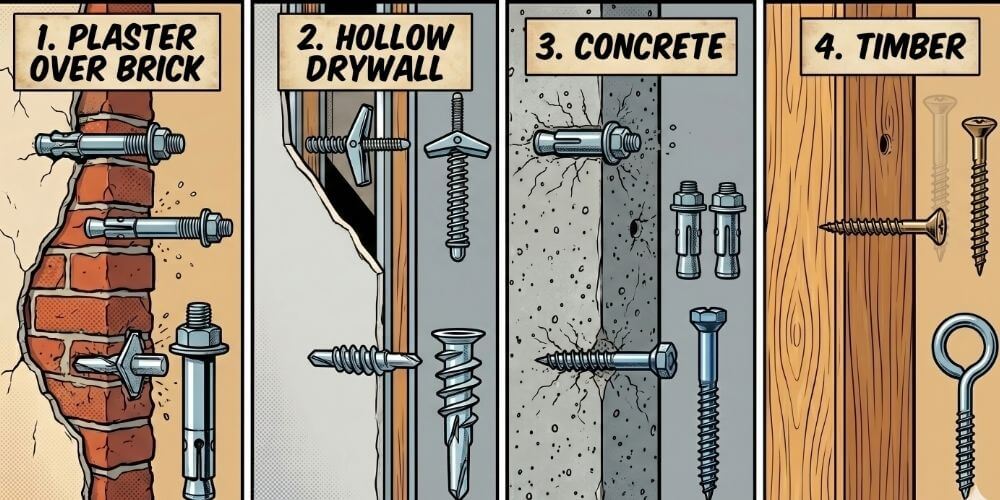
1. Using the Wrong Fixings for Your Wall Type
This is the number one cause of artwork falling off walls in Cape Town homes – and it is entirely preventable. Cape Town homes contain at least three common wall types, each of which requires a different approach to fixing.
Plaster Over Brick or Concrete Block
The most common wall type in established Cape Town suburbs from Woodstock to Constantia. These walls are solid and capable of bearing significant weight – but only if you use the right fixing. A red rawl plug with a correctly sized screw is the minimum for anything heavier than a lightweight print. For heavier pieces, use a nylon expansion anchor rated to well above the weight of the piece. The key mistake here is using plugs that are too small or too short – they grip the outer plaster layer only and pull straight out when loaded.
Drywall (Plasterboard)
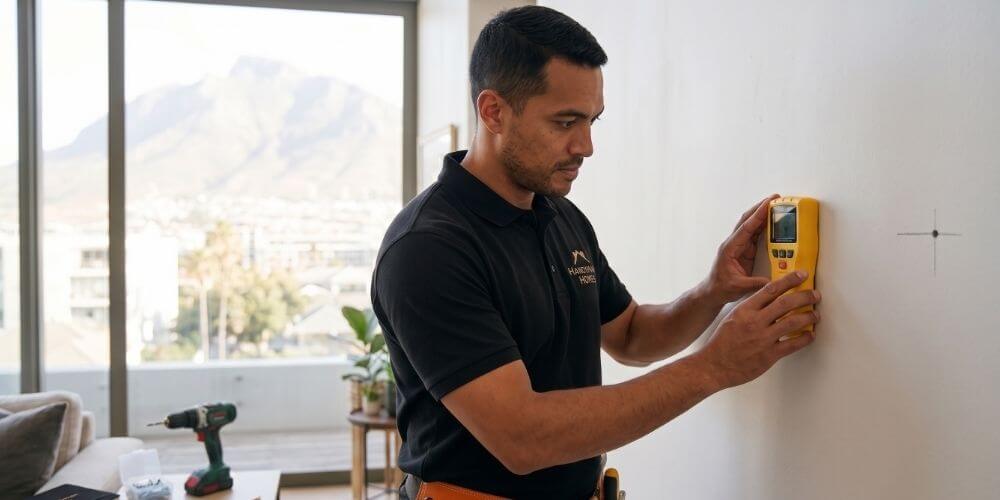
Common in newer Cape Town homes, particularly in suburbs like Parklands, Steenburg Estate, and Meadow Ridge, and in renovated interior partitions across the city. Drywall fixings are completely different from masonry fixings. Standard rawl plugs will not grip – they spin in the hole. You need either a drywall anchor (the kind that expands behind the board when driven in), a toggle bolt, or ideally a direct screw into the timber stud behind the board. A stud finder is essential for drywall installations.
Bare Concrete or Face Brick
Found in contemporary Cape Town loft conversions and in some older commercial-to-residential conversions in the City Bowl and Woodstock. These walls are very hard and require a hammer drill and a masonry bit to drill properly. Standard DIY drills often cannot penetrate dense concrete effectively. For bare concrete walls, a professional is often the most practical choice.
2. Getting the Hanging Height Wrong
Walk through any Cape Town show house or well-styled interior and you will notice that artwork seems to float naturally within the room. That is not accidental – it is the result of hanging at the correct height. The standard rule in interior design and gallery curation is to place the centre of the artwork at approximately 145-150cm from the floor. This aligns with average eye level and creates a natural visual connection between the viewer and the work.
The most common mistake is hanging artwork too high. This is especially common in Cape Town homes with high ceilings – the Victorian terraces of Woodstock and the older double-storey homes in Rondebosch and Claremont often have 3m+ ceilings. The temptation is to spread the artwork vertically to fill the wall, but this disconnects the pieces from the furniture and the people in the room. The artwork should relate to what is below it – a sofa, a console, a bed – not to the ceiling above it.
Hanging Over Furniture
When hanging artwork above a sofa, bed head, or console table, the bottom of the frame should sit 15-20cm above the top of the furniture. This creates a visual grouping that anchors the artwork to the piece below it. More than 25cm of gap and the artwork appears to be floating disconnectedly above the furniture rather than relating to it.
Hanging in Stairwells
Stairwell gallery arrangements are a different challenge entirely. The standard approach is to follow the angle of the staircase, with the centres of the artwork forming a diagonal line parallel to the stair pitch. Measure carefully before fixing anything – the geometry here is unforgiving.
3. Skipping the Spirit Level
This is the mistake that generates the most visible results – a crooked picture on an otherwise perfect wall draws the eye immediately. The human visual system is remarkably sensitive to horizontal misalignment; a tilt of as little as one degree is clearly perceptible, even if the viewer cannot immediately identify why the picture looks wrong.
The solution is to use a spirit level on every single piece, every time. A small bubble level works well for single pieces. For gallery walls or any arrangement involving multiple frames, a laser level pays for itself in time and frustration saved – it projects a perfectly horizontal line across the wall that you can use to align multiple fixing points simultaneously.
Smartphone apps that use the phone’s accelerometer as a spirit level are a useful supplement but should not be relied on exclusively – screen protectors and phone cases can affect the calibration slightly. For important pieces, confirm with a physical level.
4. Not Planning a Gallery Wall Before Drilling
A gallery wall looks spontaneous and curated at the same time – but that effortless quality is the result of careful planning before a single hole goes into the wall. Walking up to a blank wall with six frames and starting to drill is almost always a recipe for a wall full of misaligned holes and an arrangement that does not quite work.
The correct approach is to plan the layout on the floor first. Lay all the pieces out on the floor in front of the wall and move them around until you find an arrangement that works. Photograph it from above once you are happy. Then transfer the arrangement to the wall by measuring from a central reference point outward, using the floor photograph as your guide.
Paper Template Method
For complex gallery wall arrangements, the paper template method is invaluable. Trace around each frame onto kraft paper or newspaper and cut out the shapes. Tape these paper templates to the wall with low-tack tape and step back to evaluate the arrangement before committing to any holes. Adjust until it is right, then mark the fixing points through the paper.
Keep Gaps Consistent
The detail that separates a professional-looking gallery wall from an amateur one is consistent spacing between frames. Aim for 5-8cm between pieces throughout the arrangement. Inconsistent gaps – some tight, some wide – give the arrangement an unsettled look. Use a piece of card cut to your target gap width as a spacer when marking positions.
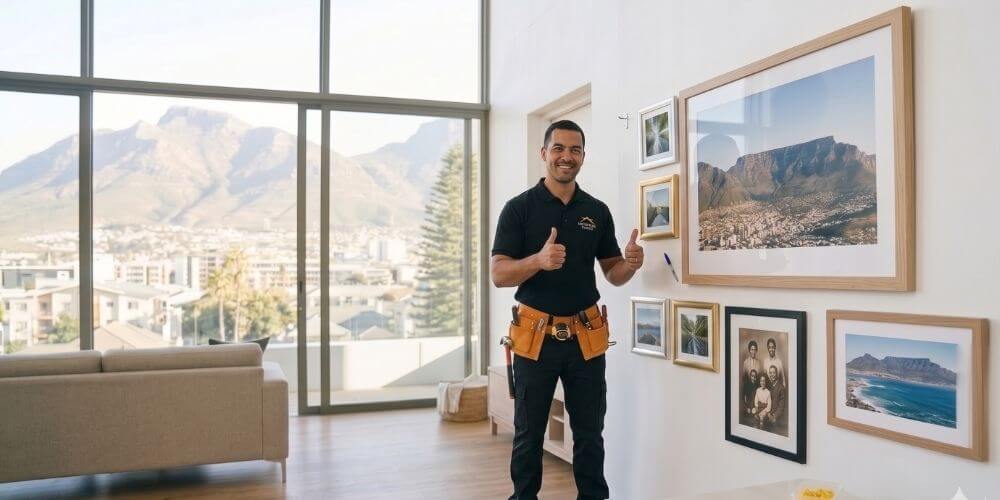
5. When to Call a Professional Picture Hanging Service
Most straightforward picture hanging is well within the capability of a confident DIYer with the right tools and fixings. But there are situations where a professional delivers results that are genuinely difficult to match at home.
Very heavy artwork – large oil paintings, framed mirrors over 15kg, sculptural wall pieces – requires precise load calculations and the correct structural fixing. Hanging these incorrectly is not just an aesthetic problem; it is a safety risk. A professional picture hanging service will assess the wall, specify the correct fixing hardware, and install with the appropriate load ratings.
Large gallery wall arrangements with many pieces also benefit significantly from professional installation. The time, precision, and equipment a professional brings means the arrangement goes up cleanly the first time, without the multiple rounds of holes that a DIY gallery wall often produces.
Handyman Homes offers a professional pro picture hanging service in Cape Town, covering everything from single statement pieces to full gallery wall installations. For shelf installation and wall fixings alongside your artwork, the shelf installation and wall fixings service handles both in a single visit.
Frequently Asked Questions
What is the correct height to hang artwork in a Cape Town home?
The standard rule is to hang the centre of the artwork at eye level, which is typically 145-150cm from the floor. In rooms with very high ceilings – common in older Victorian homes in Woodstock and Rondebosch – you can hang slightly higher, but avoid pushing artwork too close to the ceiling as it loses its connection to the room.
How do I hang heavy artwork safely on a plaster wall?
Locate a wall stud using a stud finder and fix directly into it using the correct screw and wall plug for your wall type. For very heavy pieces over 10kg, use two fixing points to distribute the load. If you cannot locate a stud, use a heavy-duty plaster anchor rated well above the weight of the piece. When in doubt, call a professional picture hanging service.
What wall plugs should I use in Cape Town plaster walls?
For standard Cape Town plaster over brick walls, a red rawl plug with a 40mm screw is suitable for most artwork up to 5kg. For heavier pieces, use nylon expansion anchors or a heavy-duty fischer plug. Avoid using small white plugs – they are only rated for very light loads and pull out easily.
Can I hang artwork on a tiled wall?
Yes, but it requires a tile drill bit and patience. Use a low-speed drill and start slowly to avoid cracking the tile. Alternatively, adhesive strips rated for tile surfaces work well for lighter pieces. For heavy artwork on tiled walls, consult a professional.
How far apart should I hang a gallery wall?
The ideal gap between frames in a gallery wall arrangement is 5-8cm. Less than 5cm and the arrangement looks cramped; more than 10cm and the pieces start to feel disconnected. Consistent spacing throughout creates a composed, deliberate look.
Should I use a spirit level when hanging pictures?
Always. Even a one-degree tilt is clearly visible to the eye, especially on a horizontal piece or a gallery wall arrangement. A small bubble spirit level or a free smartphone app works well for single pieces. For gallery walls, a laser level saves significant time.
What is the best adhesive strip for hanging artwork in Cape Town?
3M Command strips are the most reliable adhesive hanging product available in South Africa. Ensure you choose the correct weight rating for your piece, follow the bonding instructions precisely, and allow the full bonding time before hanging. Adhesive strips are not suitable for pieces heavier than 5kg or for textured or unpainted walls.
Ready to Transform Your Walls? Book Your Professional Picture Hanging Service Today
There is something deeply satisfying about a beautifully hung picture wall, the kind that looks like it has always been there, effortlessly styled and perfectly secure. That result does not happen by accident. It takes skill, the right tools, and a professional eye.
At Handyman Homes, we bring all three to every picture hanging job in Cape Town. Whether you need a single frame hung in a Cape Town apartment, a dramatic gallery wall installed in your Constantia home, or a full commercial artwork installation for your Sea Point office, we have the expertise to get it done right.
Stop staring at the bare walls. Contact Handyman Homes today for a free, no-obligation quote on professional picture hanging in Cape Town. Visit us at handymanhomes.co.zato book your appointment or to learn more about our full range of handyman services.
handymanhomes.co.za | Professional Handyman Services Cape Town