

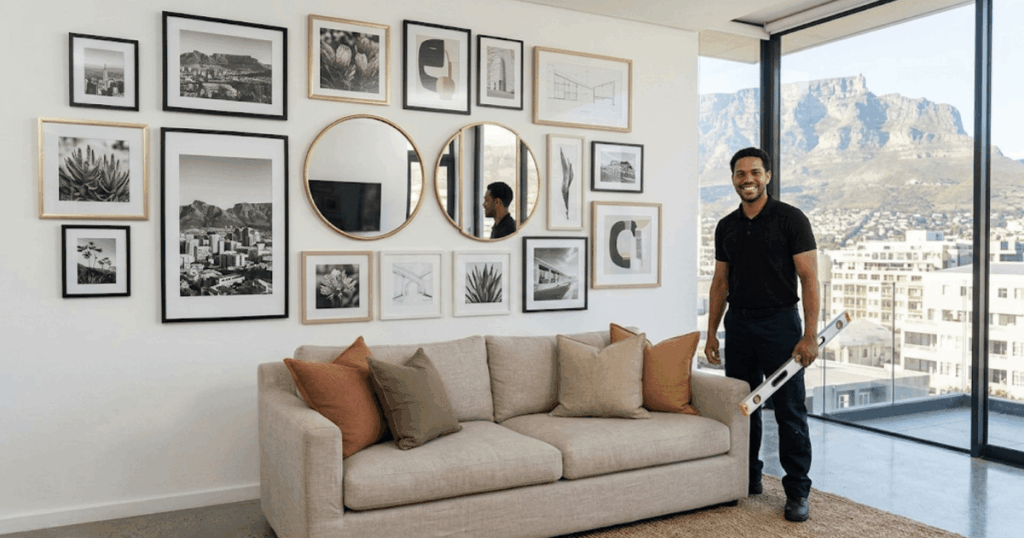
A gallery wall is one of the most impactful things you can do to a room. Done right, it transforms a blank wall into a personal narrative – a collection of art, photography, and memories that tells the story of who lives in the space. Done badly, it looks chaotic, the frames are crooked, the spacing is inconsistent, and half of them have slipped sideways by the following weekend.
Cape Town’s homes are particularly well-suited to gallery walls – high ceilings in the Victorian terraces of Woodstock and Gardens, the dramatic feature walls of modern Atlantic Seaboard apartments, the spacious hallways of Southern Suburbs family homes. This guide gives you the professional approach to planning, designing, and hanging a gallery wall that looks like it was installed by a Cape Town interior designer. And if you would rather hand the whole job to a professional from the start, the Handyman Homes picture hanging service covers gallery walls of any size or complexity.
Key Takeaways
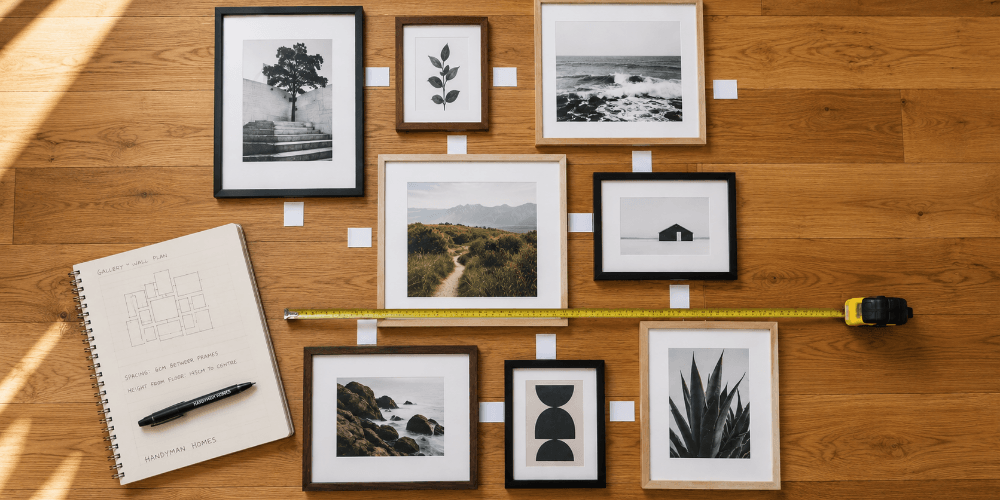
Before you think about walls and hammers, assemble all the pieces you want to include. This might be a mix of:
Lay all your pieces on the floor in the approximate footprint of your wall space. Step back and photograph from above. Try different arrangements – starting from the centre and working outward, or anchoring around your largest piece. The floor is forgiving – the wall is not.
A few principles that consistently work:
Trace each frame onto brown paper or newspaper and cut out the template. Mark the hook point on each template (measure from the top of the frame to where the wire sits under tension, or where the D-ring sits). Tape all templates to the wall with masking tape in your chosen arrangement. Adjust until everything is exactly right – moving paper is free, moving frames is not.
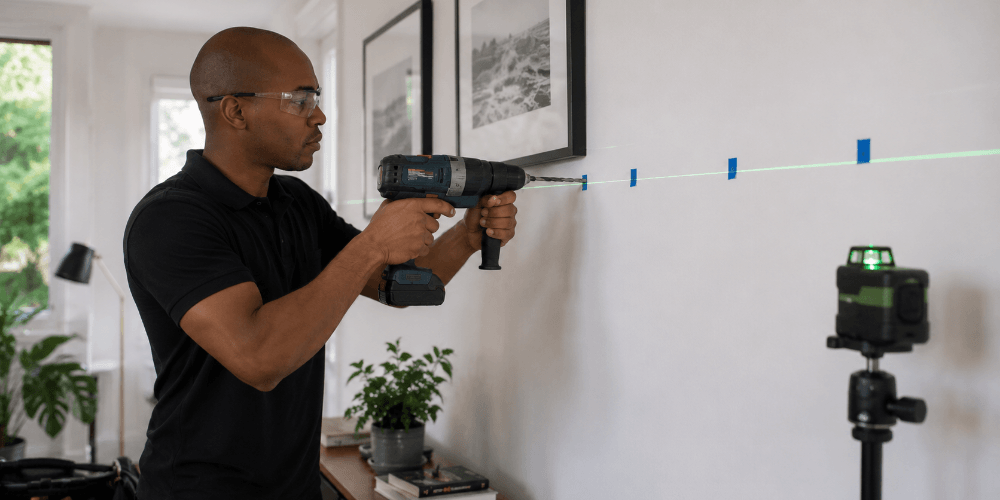
A laser level is the single most valuable tool for gallery wall installation. It projects a perfectly horizontal (or vertical) reference line across the wall, allowing you to check the alignment of hooks before any drilling. The Handyman Homes picture hanging team uses laser levels on every gallery wall installation – it is the difference between a wall that looks professional and one that looks slightly off.
Once your templates are positioned correctly, mark the hook point on each template with a pencil. Then mark through the template to the wall and remove the paper. You now have a precise set of drill marks ready to go.
Most Cape Town homes have solid brick walls with plaster finishes. For standard frames under 5kg, a masonry nail or No. 6 wall plug with a screw hook is adequate. For frames between 5 and 15kg, use a 6mm masonry wall plug with a 35mm screw. Above 15kg, use two fixing points with 8mm plugs. If you are also planning to add shelves or wall-mounted storage alongside the gallery wall, these heavier fixings apply to shelf brackets as well.
More common in newer developments and apartment partitions. Use self-drilling hollow wall anchors or toggle bolts. Check the weight rating of the anchor against the weight of your piece – always stay well below the maximum.
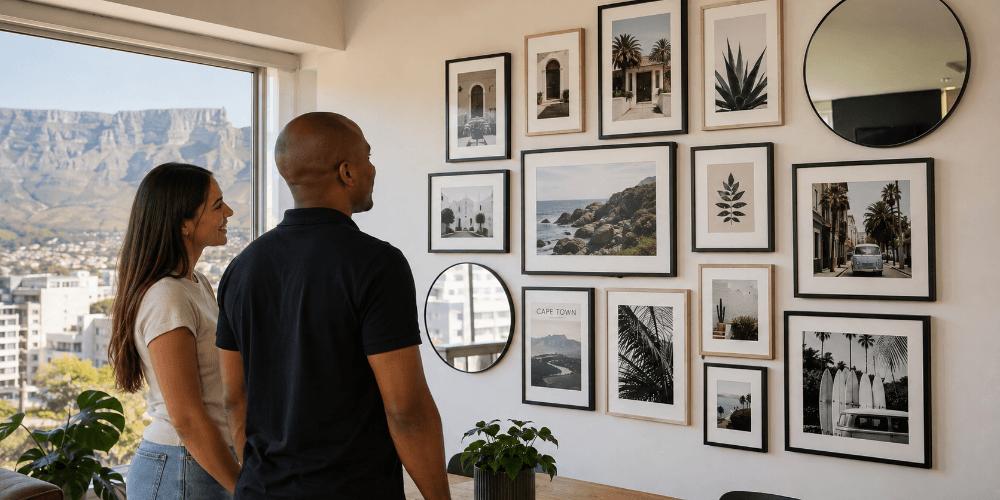
Handyman Homes offers professional gallery wall installation across Cape Town. The pro picture hanging service ensures every piece is hung at the correct height, with the correct fixings for the wall type, perfectly level, and with consistent spacing throughout.
For a complex gallery wall of 10 or more pieces, professional installation typically takes 2 to 4 hours and saves you a full afternoon of frustration – and a wall full of unnecessary holes. If the gallery wall is part of a broader home styling project, the interior design service and general handyman service can be combined in a single coordinated visit.
Contact Handyman Homes today for a gallery wall installation quote. We serve all Cape Town suburbs.
Start by choosing your wall and measuring the available space. Gather all the pieces you want to include and lay them out on the floor to experiment with arrangements before drilling a single hole. Photograph the arrangement you like best, then use that as your guide when hanging. A laser level or paper template system helps ensure accuracy on the wall.
The visual centre of the gallery wall arrangement should sit at approximately 145 to 155cm from the floor – standard eye level. For gallery walls above a sofa or console table, the bottom of the lowest frame should be 15 to 20cm above the furniture, with the arrangement centred above the piece.
A consistent gap of 5 to 8cm between frames looks intentional and balanced. Larger gaps of 10 to 15cm can work for oversized pieces or sparser arrangements. The key is consistency – pick a gap and stick to it throughout the arrangement.
Cape Town homes typically have solid brick or concrete walls with plaster finishes. These require masonry drill bits and wall plugs for secure hanging. Some newer apartments and partition walls are drywall, which requires hollow wall anchors or butterfly toggles for heavier pieces. Handyman Homes identifies the correct fixing for every wall type.
Absolutely – mirrors are a great addition to a gallery wall, adding light reflection and visual depth. Heavy mirrors over 5kg must be hung from wall-fixed D-rings or a French cleat rather than picture hooks, regardless of wall type. Handyman Homes recommends a professional assessment for any mirror over 5kg.
Professional gallery wall installation from Handyman Homes is quoted per project, depending on the number of pieces, wall type, and complexity of the arrangement. As a guide, a 10 to 15 piece gallery wall on a standard brick plaster wall typically takes 2 to 3 hours of professional time. Contact us for a specific quote.









2026 Copyright © Handyman Homes . All rights reserved. Created by Cooper Creative.